|
|
|
|
|
|
|
|
|
|
|
|
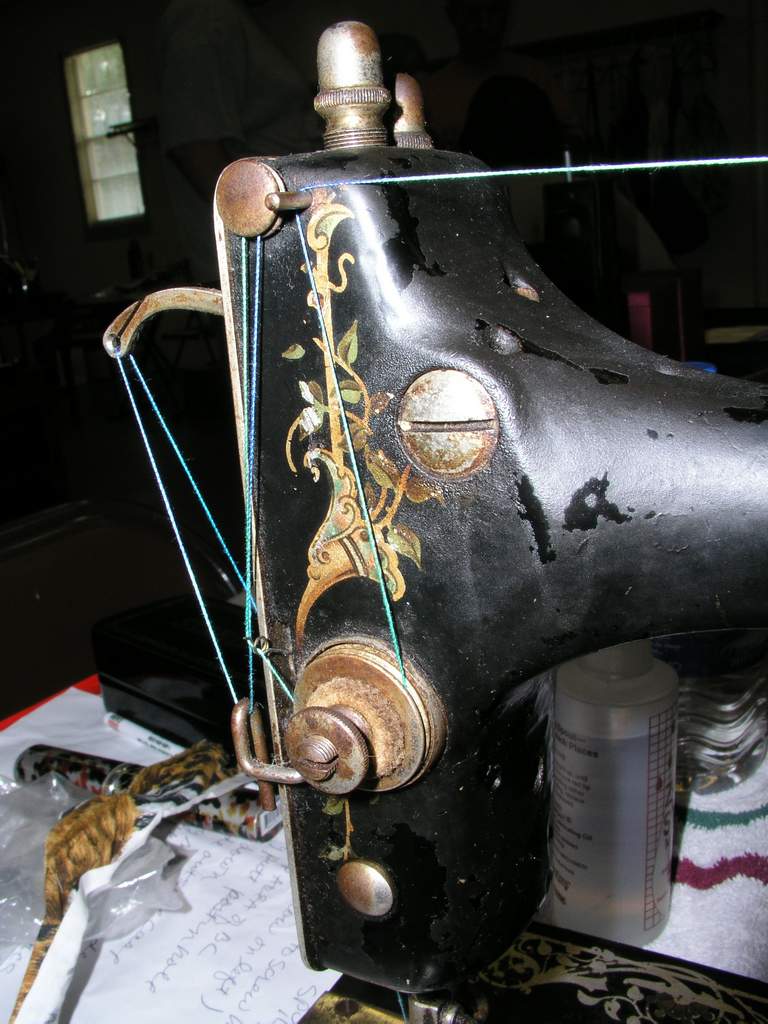
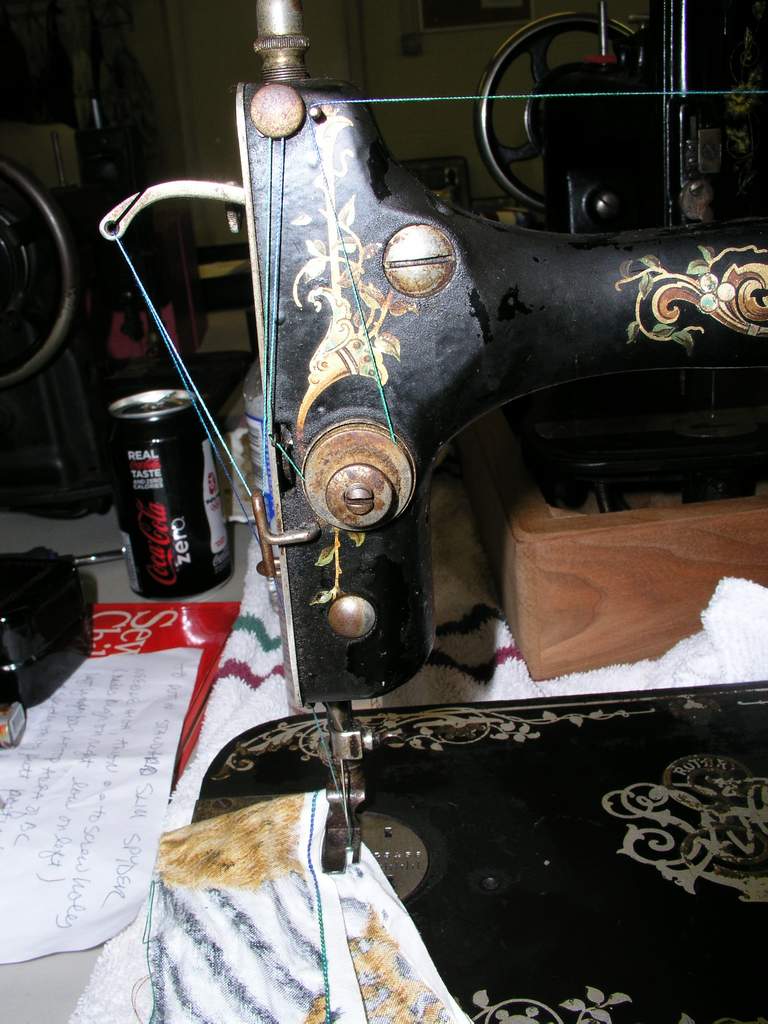
Be sure your machine is threaded correctly. There are several variations but these pics should help you threading any version. If your tension is different, you still need to thread your tension in the same order as the one in the picture.
|
|
|
|
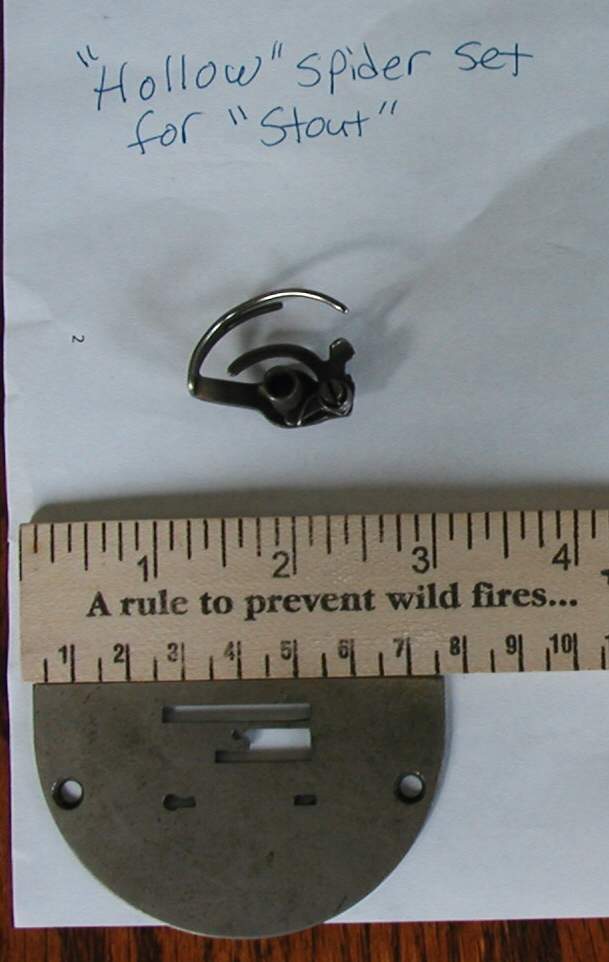
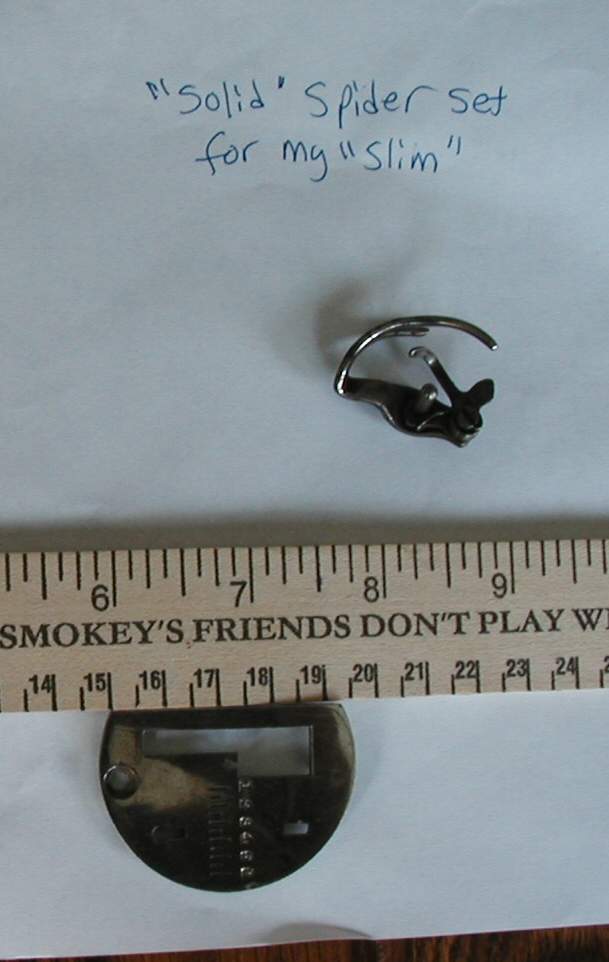
Preparing the machine for spyder insertion
Make sure you have the correct spyder version for your machine and that it has been cleaned free of rust. Oil the part where the lever rotates. Press that lever a few times to work the oil in and work out any kinks. If it still is hard to move you need to work it more till it loosens up. You must be able to move it freely with one hand to insert it into the bobbin case base correctly.
First, put the needle in the correct position. Look very closely at the pic below of the base empty of looper (click to enlarge). You will see that there are 2 screws holding in the round chrome plated housing at approx 3 o'clock and nine o'clock. When you turn the handwheel those screws do not move. However there are 2 screws just to the inside of that circle that do move when you turn the handwheel. In the pic you can easily see the one on the left, but look closely at the black area just to the left of the right side screw and you can see a round blacker area that is also a screw. You need to rotate the handwheel till those 2 inner screws are aligned just a tad lower than the 2 screws in the chrome circle. Since this is a Rotary machine this will happen 2 times during a complete rotation. Once the needle will be up, other time the needle will be below the needle plate. You want the needle up position, but understand it happens when the needle is not in the highest position it can reach.

Inserting the Spyder
There is a lever on the looper you need to pinch and hold. Think about class 15 bobbin cases and how you have to hold that lever out while inserting the bobbin, then releasing the lever when it is in place and something snaps in to place to lock the bobbin case in. This lever does the same thing. You pinch and hold while putting the spyder in place then release it. Hopefully you will hear a little click indicating the spyder is locked into position. If not, you may need to clean the area better. When the spyder has clicked into place you should be able to rotate the hand wheel freely and be set to go.
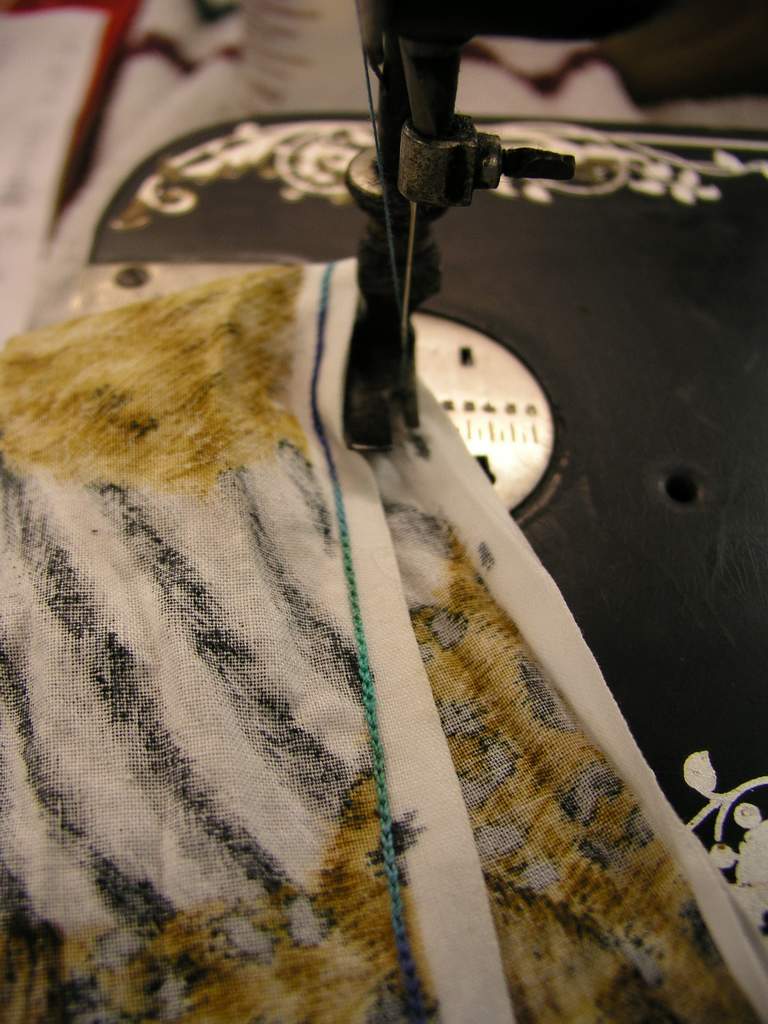
The sample below was done with 2 strands of thread threaded together in the same path and both thru the needle hole. It was done simply by turning the hand wheel without being in a treadle. The top side looks like a regular stitch, and the chainstitch will be on the underside of the fabric.
Many thanks to Cat Jones who tinkered till she figured all this out and
then
shared with me at Di's Tenn Toga 08.